Massachusetts Fireplace Remodeling Tips
Remodeling your fireplace can completely redefine a room. But after building and making over fireplaces across Central Massachusetts since 1995, I can tell you the difference between one that looks custom and one that looks like a weekend project usually comes down to a handful of decisions you make before anyone picks up a trowel. Here's how I walk homeowners through it — roughly the same order I'd use standing in your living room.
Phase 1: The Safety and Structural Audit
Before any cosmetic changes, the "bones" have to be sound. I won't put a nice face on a fireplace that isn't safe, so this comes first every time.
- Audit the firebox. Check for cracks or loose firebricks. Any structural damage gets repaired before we talk looks — this is a fire, in your house.
- Test the damper. It should open and close smoothly. A stuck damper is a major heat-loss culprit and an easy thing to fix while everything's apart.
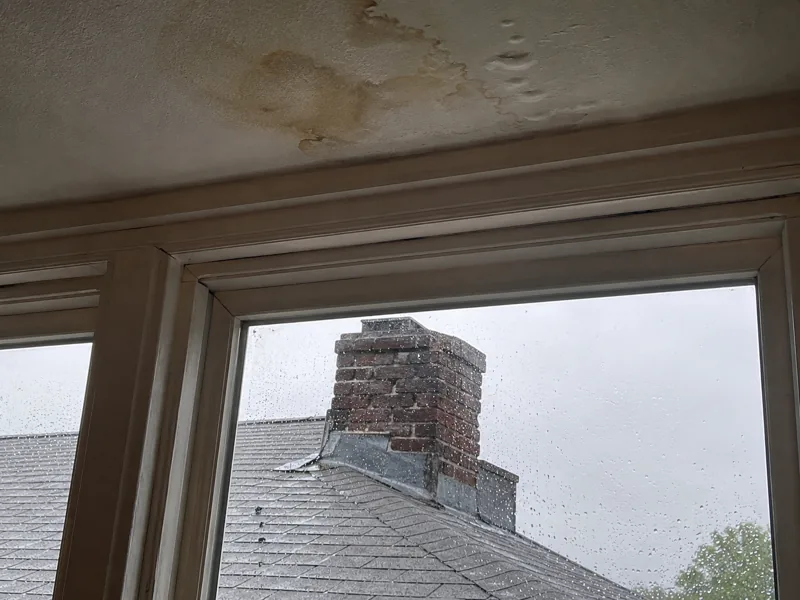
- Inspect the flue and crown. Look for creosote buildup or a damaged cap. A professional inspection is non-negotiable before a remodel.
- Know what you're working with. In a lot of older homes the surround and firebox are a single tied-together unit. If they are, a "quick reface" can turn into a full teardown and rebuild — better to find that out on paper than halfway through.
A couple of structural realities people don't expect: you can almost always make a fireplace wider, but you can't always make it narrower. There are minimum clearances to the firebox that exist for fire safety, and I won't crowd them no matter how good the drawing looks. And if you're dreaming of making a raised hearth flush with the floor — yes, it can be done, but know what you're signing up for. The concrete slab under that raised hearth has to be cut down about two inches. The cheaper work-around is leaving the firebox sitting higher than the hearth, but then you've got a lip that logs like to roll off of. I'll tell you honestly which one your setup actually wants.
Before you paint anything, read this
This is the one I wish more people asked me about first. Once you paint brick, it's painted until somebody physically removes it — paint does not come back off. That's fine if you love the painted look. It becomes a problem the day you decide you'd rather have a real stone facade, because mortar will not bond to a painted surface. There are adhesives, but for the pull weight of natural stone I don't trust them long term — stone is heavy and gravity is patient. The real fix is screwing cement board over the painted brick and setting the stone to that. Not a deal breaker, just an extra step and extra cost that you created the day you picked up the roller. Same rule if you've got painted brick and want a new brick face instead: easy job, but the painted brick on the front has to come out first. So paint if you want it — just do it knowing what it locks in.
Phase 2: Design and Material Selection
With the safety audit clear, now we make it beautiful. This is where a little experience saves you from the mistakes I see most often.
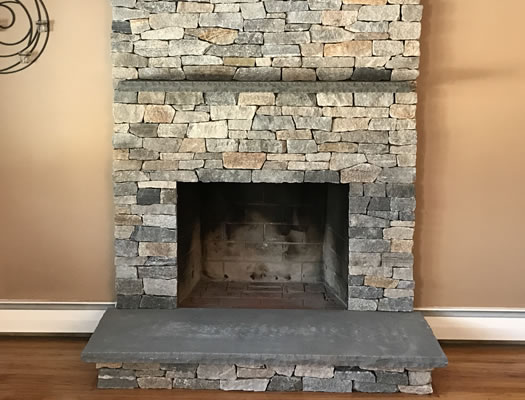
Pick your stone to fit the area. For just the immediate surround, a ledgestone looks right — the smaller, linear coursing suits a tighter space. For a full floor-to-ceiling facade, you've got room for a larger, chunkier stone; it reads as intentional instead of busy. Matching the stone scale to the wall size is half the battle.
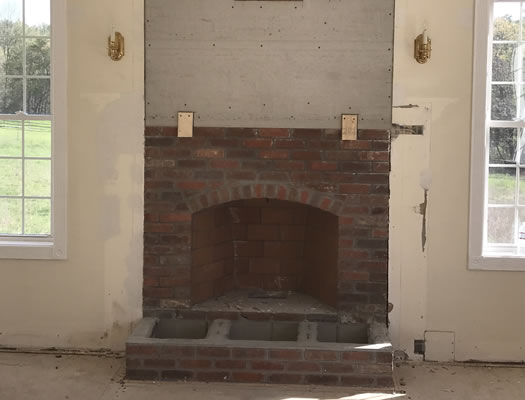
Here's a real one to show you what I mean. This was a job in Lunenburg. The homeowners started with a plain solid-red-brick fireplace — structurally fine, but dated and flat in the room:
Because it was a full floor-to-ceiling wall, we went with a larger natural stone instead of a tight ledgestone — it had the room to carry that scale — and set a timber beam mantle rather than capping it partway up. Same firebox, same footprint, completely different room:
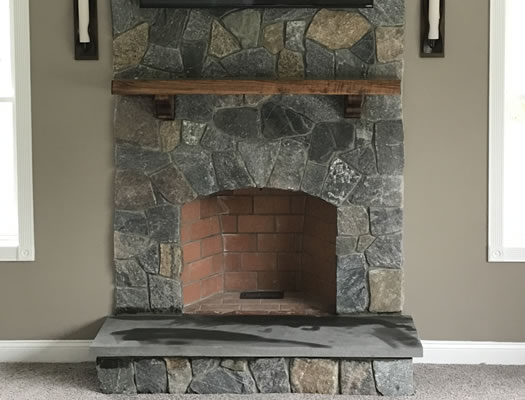
Get the mantle right — this is where makeovers go sideways. If you run stone up to about mantle height and then cap it with a bluestone slab, it tends to look unfinished to most eyes, like the wall couldn't decide where to stop. A timber beam or a more formal mantle almost always looks better there. Bluestone as a mantle does look great in one specific case: when you run the stone all the way to the ceiling and the bluestone becomes a shelf floating in that expanse. Context is everything. And if you want the beam look without sourcing a real timber, there are composite beams that honestly look just like real wood — they rest and nail right onto a 2x4, which makes for a clean install.
One cheap trick with an outsized payoff: paint the inside of the firebox flat black. Against a black opening, the stones around it really pop. It's the least expensive upgrade in the whole job.
Phase 3: Efficiency and Functionality
- Improve thermal output. A "fireback" — a heavy iron panel — reflects heat back into the room. For real heating performance, though, many homeowners step up to a Rumford rebuild, which is built to throw heat.
- Gas integration. If you want gas logs or a gas starter for your wood fires, now — while things are open — is the time to run the utility lines.
- Performance vs. ceremony. Decide honestly whether you want a "ceremonial" factory-built unit or a high-performance masonry hearth designed to actually heat the space. Both are valid; they're just different jobs.
Can you DIY a fireplace makeover?
Honest answer: yes and no.
Yes, if you can keep a straight line, cut stone cleanly with an angle grinder, respect your eyes and lungs (the dust is no joke), and work with cement without wearing half of it. Some of the veneer products at the big-box stores like Lowe's are even cuttable with a handsaw and come as almost puzzle-piece panels in a pre-set layout. Feels a little absurd to me as a mason, but for the right person it's a real option.
The catch is — you guessed it — painted brick. If your fireplace is painted, your DIY job starts with gluing and Tapcon-ing cement board to the brick before any stone goes up. If you want that beam mantle, the composite ones I mentioned nail onto a 2x4 and are genuinely DIY-friendly.
Where I'd tell you to call me instead: anything structural, anything where firebox clearances are in play, or a full teardown-and-rebuild. That's not me protecting my turf — it's fire safety.
Expert Fireplace Remodeling in Lancaster & MetroWest
Planning a fireplace is a balance of safety, design, and knowing which shortcuts cost you later. I've made most of these mistakes so you don't have to. We do custom fireplace makeovers throughout Lancaster, Wayland, Concord, and the surrounding towns.
Send me a photo of what you've got and your town, and I'll tell you what I'd do with it. Call 978-365-6800 or complete our online request form.
Related masonry guides
For a closely related explanation, see how a dated Wayland fireplace was rebuilt into a floor-to-ceiling stone focal point.
For the next practical step, review which proportions, materials, draft requirements, and room conditions shape a successful masonry fireplace design.